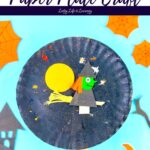
Witch Paper Plate Craft
My Witch Paper Plate Craft is a delightful and engaging activity that will spark your child's creativity and imagination. With just a few simple materials and easy-to-follow instructions, they can create their own whimsical witches to decorate their space or use in imaginative play.
Equipment
- 35 All Purpose Paint Brushes Value Pack
- Sharpie - Fine Point Paint Marker
- Popsicle Sticks for Crafts
Ingredients
- Paper Plate
- Popsicle Stick
- Black and Yellow Paint
- Paintbrush
- Construction Papers Yellow, Orange, Green, White, and Black
- Scissors
- Yellow Yarn
- Marker
- Glue Stick
Instructions
- Begin by painting the paper plate black. Allow it to dry completely. Once the paint is dry, make a small slit at the bottom part. This will be where the witch will be inserted later.
- Using a paintbrush, sprinkle drops of white and yellow paint on the top of the paper plate. This will create a spooky sky effect, adding an extra touch of magic to your craft.
- Take your construction paper and cut out the witch shape. You can go with simple shapes or use a handy template to trace and cut. After that, it's time to piece everything together.
- Draw the witch's face using a marker.
- Create the witch's broom by attaching yellow yarn to a popsicle stick.
- Once you're done, attach the broom to the bottom of the witch and then attach it to the paper plate.
- Enhance the spooky ambiance by attaching a yellow piece of paper in the shape of a moon to the left side of the paper plate.
- Lastly, insert the witch into the slit at the bottom of the paper plate. This will create the illusion of the witch flying through the night sky.
- And voila! Your paper plate flying witch is complete!